 Save It
 The first time I attempted a Red Betty Boop Heart Cake was for my sister's birthday, who collects vintage cartoon memorabilia. The kitchen smelled like vanilla and cocoa as I mixed that vibrant red batter, wondering if the cartoon silhouette would actually work. My hands trembled slightly while piping the chocolate outline, but when I finally placed that glossy Betty Boop figure onto the cake's velvety surface, I couldn't help but grin at how the playful design transformed a simple dessert into something magical.
Last Valentine's Day, I brought this cake to a friend's dinner party, carrying it carefully through light snow. When I unveiled it at the table, conversation stopped mid-sentence as everyone leaned forward to admire the vintage character silhouette against the heart-shaped red cake. A friend's young daughter kept pointing at Betty Boop, completely mesmerized, while the adults debated who would get the slice with the chocolate decoration. That cake disappeared faster than any dessert I've ever made.
Ingredients
- Cake flour: After experimenting with different flours, I found cake flour creates that impossibly tender crumb that practically melts on your tongue.
- Red gel food coloring: The liquid ones left my batter watery and pale, but gel coloring gives that dramatic red without altering the texture.
- Cream cheese: Full-fat cream cheese creates a frosting with the perfect balance of tanginess and richness, and I learned the hard way that low-fat substitutes can make it runny.
- Dark chocolate: The slight bitterness in good quality dark chocolate creates a sophisticated contrast against the sweet frosting, making the Betty Boop silhouette both beautiful and delicious.
Tired of Takeout? 🥡
Get 10 meals you can make faster than delivery arrives. Seriously.
One email. No spam. Unsubscribe anytime.
Instructions
- Prepare your battlestation:
- Preheat your oven to 350°F while greasing those heart pans like your cake's life depends on it. The parchment paper lining is non-negotiable unless you enjoy cake stuck to pans, which trust me, I've experienced enough for both of us.
- Create the velvet base:
- Whisk your dry ingredients in one bowl, then cream that butter until it's practically floating. When you add eggs one by one, you're building the foundation of your cake's texture, so be patient with each addition.
- Make it ruby red:
- Fold in that gorgeous gel coloring until the batter transforms into a vibrant red sea. This is when the kitchen magic happens as vanilla and cocoa aromas swirl around you.
- The secret foam reaction:
- That little vinegar-baking soda mixture might seem strange, but it creates tiny air pockets for an exceptionally light texture. Watch it foam and feel like a kitchen scientist for a moment.
- Bake with love:
- Divide the batter between pans, smoothing tops for even hearts. Your kitchen will fill with the most incredible warm, sweet scent as they bake, signaling the transformation happening inside.
- Craft the cloud frosting:
- Beat cream cheese and butter until they become one luxurious mixture. The powdered sugar should be added gradually or you'll create a snowstorm in your kitchen, which I've done more times than I care to admit.
- Assemble with patience:
- That 15-minute chill after placing your first layer is crucial for structural integrity. Think of it as the cake's meditation moment before the final presentation.
- Create Betty Boop magic:
- Tracing the silhouette with chocolate requires steady hands and faith. I hold my breath during this part, letting the chocolate flow in smooth lines over the parchment.
 Save It
 The most memorable moment with this cake happened when I made it for my grandmother's 80th birthday. She grew up during Betty Boop's heyday and hadn't thought about the character in decades. When she saw the cake, she started sharing stories about going to the cinema as a young woman and how Betty Boop was considered quite scandalous then. Four generations sat around the table, eating red velvet cake and listening to Grandma's tales of a different era, all because of a cartoon character made of chocolate.
The Art of the Silhouette
I've found that freezing the parchment paper with the stencil underneath for about five minutes before piping the chocolate creates a more precise outline. The cold surface slows the chocolate's spread just enough to maintain those delicate Betty Boop details, like her distinctive curls and eyelashes. After a particularly frustrating attempt where the chocolate kept spreading and obliterating her features, this trick has saved countless silhouettes and prevented many near-kitchen meltdowns.
Color Psychology
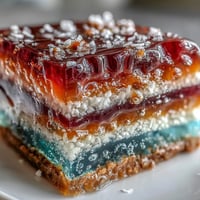
There's something about the contrast of that deep red cake against the stark black silhouette that captures attention like nothing else. When experimenting with different color combinations, nothing matched the visual impact of this classic pairing. I once tried a blue cake with white chocolate Betty for a baby shower, but it lacked the same dramatic presence and vintage feel that makes this version so special.
Serving Suggestions
The temperature of this cake matters more than you might think for the full experience. Serving it completely chilled dulls the flavors, while room temperature brings out the buttery notes and allows the cocoa undertones to shine through the red velvet.
- For a special presentation, dust the serving plate with a light coating of cocoa powder before placing the cake, creating a subtle frame that enhances the red color.
- Pair each slice with fresh berries to echo the red theme while providing a tart counterpoint to the creamy frosting.
- If serving at a party, prepare extra chocolate silhouettes as take-home treats, wrapped in cellophane tied with red ribbon.
 Save It
 This cake represents more than just flavors and textures to me. It's become my signature celebration piece, bringing together nostalgia and artistry on a plate that never fails to create a moment of shared joy around the table.
Recipe FAQs
- → Why is vinegar added to the red cake batter?
The vinegar activates the baking soda, creating tiny bubbles that result in a lighter, tender crumb. It also enhances the red color intensity while balancing the sweetness with subtle tanginess typical of red velvet-style cakes.
- → Can I make the chocolate silhouette ahead of time?
Absolutely. Prepare the dark chocolate silhouette up to a week in advance and store between sheets of parchment paper in an airtight container at room temperature. Handle gently when transferring to the frosted cake to prevent cracking.
- → What's the best way to achieve vibrant red color?
Use gel-based food coloring rather than liquid. Gel provides concentrated pigment without altering the batter consistency. Start with 1 tablespoon and add more if needed—the color will deepen slightly during baking.
- → How do I prevent the cream cheese frosting from becoming too soft?
Ensure both cream cheese and butter are fully at room temperature before beating—this prevents graininess. After applying the crumb coat, chill the cake for 15 minutes before adding the final layer. Refrigerate the finished creation for 30 minutes before serving for clean slices.
- → Can I substitute the heart-shaped pans?
Yes, two 9-inch round pans work beautifully. You'll lose the heart shape but gain a classic red velvet look. Baking time remains the same. For a playful alternative, bake in one 9x13-inch pan and cut smaller heart shapes from the finished cooled cake.
- → Why does the batter foam when adding the baking soda mixture?
This chemical reaction is exactly what you want—the carbon dioxide released creates air pockets for a light, fluffy texture. Fold gently to preserve these bubbles, and transfer to pans promptly to bake while the leavening is most active.