 Save It
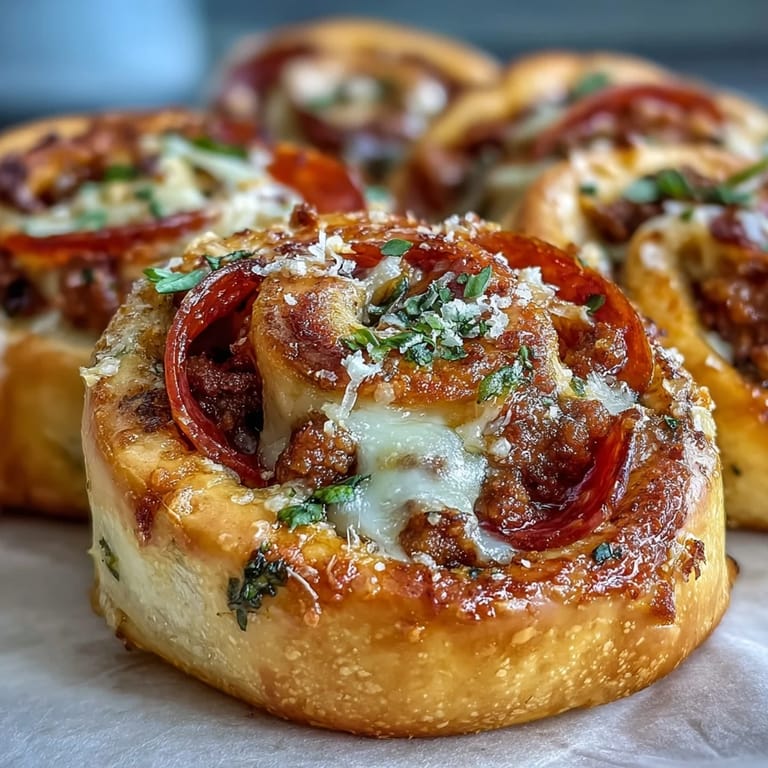
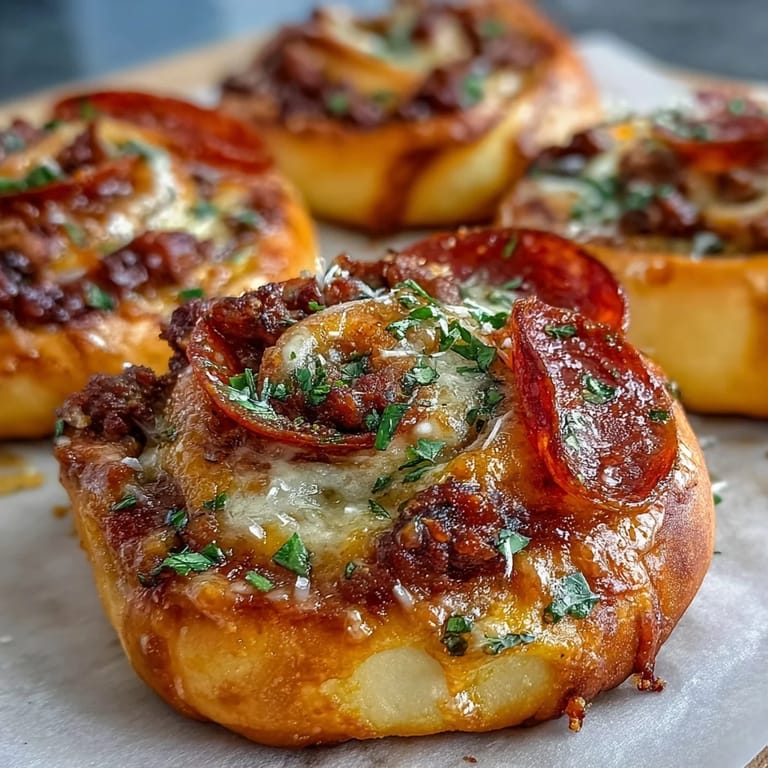
 My gym buddy Marco texted me one Tuesday asking if I could meal prep something that didn't taste like cardboard. That question stuck with me through my afternoon workout, and by the time I got home, I was already thinking about pizza rolls—but the protein version he actually needed. These aren't the frozen snacks we ate in college; they're stuffed with lean beef, pepperoni, and melty cheese all wrapped up in a deceptively simple Greek yogurt dough that somehow tastes way better than it has any right to.
I made a batch for my sister's book club last month, and watching people reach for a third roll while pretending they were "just trying one" was worth every minute of prep. Someone actually asked if I'd started a catering business, which is the kind of comment that makes you realize you've stumbled onto something good.
Ingredients
- Greek yogurt (2 cups): This is the secret weapon—it keeps the dough tender without heavy cream, and honestly, once you see how it transforms into something that tastes nothing like yogurt, you'll want to use it for everything.
- Self-rising flour (2 cups): Makes the dough rise naturally without extra yeast fussing; if you don't have it on hand, mixing it yourself takes about a minute and tastes fresher anyway.
- Egg (1 large): Binds everything together and gives the rolls a subtle golden finish that makes them look homemade in the best way.
- Garlic powder and salt (1/2 tsp each): These quiet the dough's flavor profile just enough so the filling steals the show.
- Lean ground beef (200g): Lean matters here because excess fat pools in the filling and makes the rolls greasy; brown it with intention and drain it well.
- Pepperoni slices (80g): Turkey or beef pepperoni works great if you're watching sodium; regular pepperoni adds that salty snap that makes people keep coming back.
- Part-skim mozzarella (1 cup): Shred it fresh if you can—pre-shredded has anti-caking agents that sometimes make it stick together in clumps instead of melting smoothly.
- Pizza sauce (1/2 cup): A good sauce carries the whole filling, so don't reach for the sad glass jar in the back of your cabinet; spend two extra dollars on something you'd actually eat plain.
- Italian herbs, black pepper, and red pepper flakes (to taste): The herbs freshen up the beef filling, black pepper keeps things savory, and red pepper flakes are there if you want heat—totally optional but honestly, they make it special.
- Olive oil, Parmesan, and dried parsley (for topping): These last-minute additions are what make people think you fussed over these rolls; the oil gets them golden, the Parmesan adds umami, and the parsley makes them look restaurant-ready.
Tired of Takeout? 🥡
Get 10 meals you can make faster than delivery arrives. Seriously.
One email. No spam. Unsubscribe anytime.
Instructions
- Set your stage:
- Preheat the oven to 400°F and line a baking sheet with parchment paper—this takes thirty seconds and saves you from sticking later.
- Brown the beef:
- Cook the ground beef in a nonstick skillet over medium heat for about 4 to 5 minutes, breaking it apart as it browns, then drain any excess fat and season it with black pepper and Italian herbs. Let it cool just enough to handle, because hot beef will scramble your cheese when it hits the dough.
- Mix your dough base:
- Combine Greek yogurt, self-rising flour, egg, garlic powder, and salt in a large bowl, stirring until a sticky dough comes together—don't overthink this part, it's supposed to be slightly tacky. Flour your work surface lightly and knead for 2 to 3 minutes until the dough smooths out and feels alive under your hands.
- Roll it out:
- Press the dough into a rectangle about 12 by 10 inches; if it fights back, let it rest for a minute and try again. The goal is even thickness so everything cooks at the same pace.
- Sauce and fill:
- Spread pizza sauce evenly over the dough, leaving a 1/2-inch border so it doesn't squeeze out the sides when you roll it up. Scatter the cooked beef, pepperoni slices, and mozzarella across the sauce in roughly even patches.
- Roll and slice:
- Starting from a long edge, roll the dough tightly toward you like you're rolling a sleeping bag, then use a sharp knife to slice it into 12 equal pieces. If the knife sticks, wipe it clean between cuts—this small habit prevents the filling from smearing.
- Arrange and dress:
- Place each roll cut-side up on the prepared baking sheet, brush the tops lightly with olive oil, then shower them with Parmesan and dried parsley. This step looks simple but it's the difference between homemade and from-a-box.
- Bake until golden:
- Bake for 18 to 22 minutes, watching for golden brown edges and bubbling cheese at the corners. The exact time depends on your oven's personality, so start checking around 18 minutes.
- Cool and serve:
- Let them cool for a few minutes before eating so the cheese sets slightly and you won't burn the roof of your mouth on molten filling.
 Save It
 Last week I caught my nephew sneaking a fourth roll from the cooling rack when he thought no one was looking, and that's when it hit me—these transcended snack territory completely. They were fuel that tasted like something you'd actually want to eat, which is the whole point of high-protein cooking that doesn't feel like punishment.
The Dough Truth Nobody Tells You
Greek yogurt dough seems like a cheat code until you actually make it and realize it's not a cheat at all—it's just different. The yogurt adds moisture and tang that all-purpose flour alone can't deliver, and the self-rising flour does the heavy lifting without needing yeast or long rise times. I used to buy the big tubs of yogurt and stare at them guiltily, but now I keep them around specifically for doughs like this because they're the base of something worth eating.
Why the Filling Matters More Than You Think
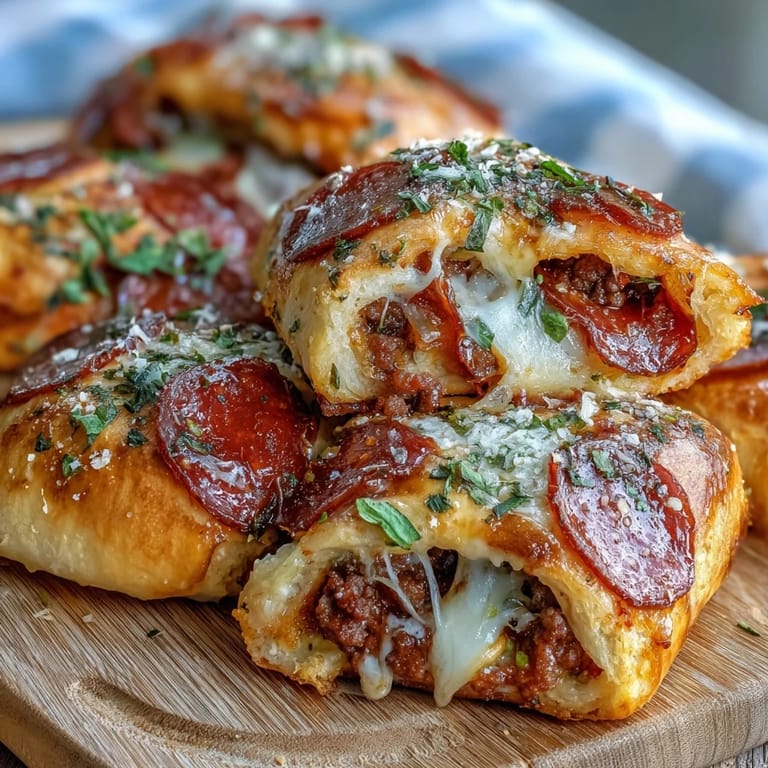
The beef and pepperoni combination isn't random—it's about creating layers of flavor that hit different notes on your tongue. The beef brings earthiness and protein density, the pepperoni brings salt and smoke, and the cheese brings richness that ties everything together. When I first made these, I skipped the herbs in the beef and they tasted flat; adding them back made everything snap into focus. Quality ingredients in the filling show up in every bite, so this is where you splurge a little if you can.
Make-Ahead Magic and Freezing Strategy
These freeze like champions, which means you can make a double batch on a lazy Sunday and solve the question of what to eat for the next two weeks. I slice and freeze them raw on the baking sheet, then transfer them to a freezer bag once solid—that way they don't stick together in a sad clump. Reheating from frozen takes about 10 to 12 minutes at 350°F, and they come out tasting nearly as good as fresh, which is honestly remarkable.
- Let the rolls cool completely before freezing or you'll end up with condensation that makes them soggy when thawed.
- Label your freezer bag with the date and contents because future-you will appreciate knowing exactly what treasure you buried in there.
- These taste best eaten within two to three weeks of freezing, though they technically last longer—quality declines if you push it past that window.
 Save It
 These rolls taught me that high-protein eating doesn't require suffering through bland food or complicated recipes—sometimes it just takes rethinking what's possible with ingredients you already have. Make a batch and watch what happens.
Recipe FAQs
- → Can I make these rolls ahead of time?
Yes, these rolls are excellent for meal prep. Bake as directed, let cool completely, then store in airtight containers in the refrigerator for up to 4 days. They also freeze beautifully for up to 3 months. Reheat from frozen at 350°F for 10-12 minutes.
- → What makes the dough high in protein?
The dough uses plain Greek yogurt as the base ingredient, which is naturally high in protein. Combined with an egg and self-rising flour, this creates a soft, protein-rich dough without needing protein powder or other supplements.
- → Can I substitute the meat for vegetarian options?
Absolutely. Replace the ground beef and pepperoni with sautéed mushrooms, diced bell peppers, spinach, or plant-based meat alternatives. The rolls will still be delicious and protein-rich from the yogurt dough and cheese.
- → Why is my dough too sticky to work with?
Greek yogurt brands vary in thickness and moisture content. If your dough is too sticky, add flour one tablespoon at a time until it becomes manageable. Lightly flouring your hands and work surface also helps.
- → How do I prevent the rolls from drying out?
Avoid overbaking—watch for a golden brown color and bubbling cheese. Brushing the tops with olive oil before baking helps maintain moisture. Store baked rolls in airtight containers and reheat with a damp paper towel to restore softness.
- → Can I use regular yogurt instead of Greek yogurt?
Greek yogurt is essential for this dough because of its thick consistency and high protein content. Regular yogurt is too thin and will result in a wet, unworkable dough. Stick with plain Greek yogurt for best results.